Hosting Your Notes Using Github Pages
Note: There is no guaranteed way to keep your website private with GitHub Pages but there are a few ways to reduce your websites visibility. If you would like a more private setup you will need a website host that supports an actual web server and then you would add authentication to your website.
1: Create a management repo, see the “Master Management Repo Setup” section.
2: Add an empty file titled ".nojekyll" in the sites root folder. This is needed because GitHub Pages uses jekyll which is not compatible with all file names generated by cherrytree, causing some pages not to load if jerkyll is not disabled using this file.
3: Add a “robots.txt” file in your your sites root directory with the following code to prevent (not stop) indexing of the site by search engines:
User-agent: *
Disallow: /
4: In your “index.html” file add this meta tag in the "head" section to also prevent search engine indexing:
<meta name="robots" content="noindex, nofollow">
5: Now you should start a temporary local web server for your website files, as cache generation can fail with GitHub Pages due to throttling. Once you have your local server running you will need to generate and download the page structure and image structure cache files by clicking "Download Search Cache Files". This will generate a cached structure of the HTML files, prompting a download for "page-structure-cache.json", and then scan the text inside every image and promt a download for "image-text-cache.json". MAKE SURE TO ALLOW MULTIPLE DOWNLOADS FOR THE SITE IN YOUR BROWSER. Then upload both of these cache files to the sites main root folder. Remember to generate and upload new cache files when updating a site with new notes otherwise the search function will break from using a stale cache!
Note: If your cache generation ends without scanning all your images and providing both a “page-structure-cache.json” and a “image-text cache.json” files then GitHub Pages is throttling your page and file requests. In this case you should start a local web server temporarily to generate your cache files locally and then upload them to your sites root folder. This has been tested and can be done easily with an extenstion like Live Server in VS Code.
6: Create a new github repo with a random string attached to the repo name and set it as a private repo. For example: mynotes-we8932ajk32. This random string is to prevent someone from guessing the sites URL. You can upload the files directly using the GitHub website or initialize a git repo inside the sites root folder and push the repo to github.
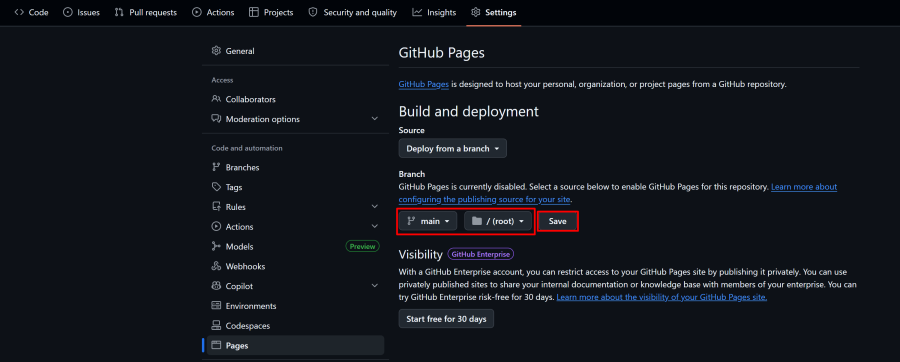
7: Initialize a GitHub Pages site in the repo settings:
Note: You will need a GitHub Pro subscription on your account ($4 a month) for your repo to remain private while hosting with GitHub Pages. You will be promted by GitHub to upgrade your account for the repo to remain private when you try to setup a GitHub Pages site for your private repo. See: Link to upgrade your GitHub Account.
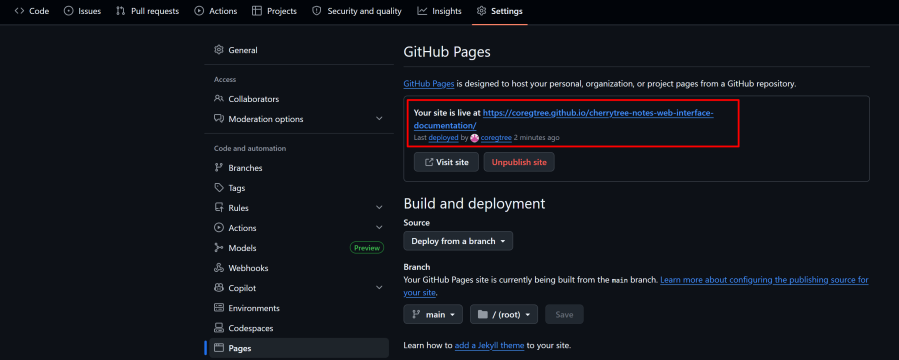
After a few minutes you will see that the site is live when you refresh the page:
Master Management Repo Setup
If you have multiple note repos it will be a long process to update the “master-script.js” and “master.css” files with a new web interface release. Follow these stetps to setup a master repo.
1: Create a repo that contains only the “master-script.js” and “master.css” files and set the repo as private.
2: Initialize a GitHub Pages site for this master repo.
3: Modify each “master-script.js” note website repo file to point to the master repo like this:
var script = document.createElement('script');
script.src = 'https://YOURUSERNAME.github.io/MASTERREPONAME/master-script.js';
document.head.appendChild(script);
4: Modify each “master.css” note website repo file to point to the master repo like this:
@import url("https://YOURUSERNAME.github.io/MASTERREPONAME/master.css");
5: Done! Now you can update the web interface for all of your note websites using this master repo.